


Grooving on Metal Clay and Enameling
- Aug 26, 2022
- 19 min read
My Class
“Grooving on Metal Clay & Enamels” at The Enamelist Society Conference “Alchemy6”, at Arrowmont School of Arts and Crafts August 2022 including some musings on the Exhibitions and What I Learned
Conference and workshop photography by Evan J. Soldinger;
Students' pieces were photographed by each artist.
In 2021, I received an invitation to teach a three-day class, “Grooving on Metal Clay and Enamels”, plus two Break-Out Sessions, “Metal Clay Speaks Champlevé”, at The Enamelist Society Conference, “Alchemy6” scheduled for August of 2022.
As I sat at my desk in The Berkshires, in April of 2022, working out the details of my class, I was notified that my neckpiece, “Acilius Pied Alongé” had been accepted in The Enamelist Society’s biennal international exhibition, “Alchemy6”. The jurors for “Alchemy6”, the 18th biennial The Enamelist Society exhibition were Jan Smith <https://jansmith.ca/>, Ana Lopez <https://www.anamlopez.com/>, and Amy Roper Lyons <https://amyroperlyons.com/portfolio>. This exhibition was to travel from Arrowmont School of Arts and Crafts to the University of Arkansas (8/2/22-9/2/22), Little Rock, Arkansas (9/22-10/22) and then finally to the Ohio Craft Museum, Columbus, OH ( 2/1/23-4/15/23). My neckpiece would not return home to me until April 2023.

It’s so interesting that The Enamelist Society uses the same word to describe the experience of using enamels as those of us who use metal clay have used to describe the process of sintering our various metal clays. Though neither group is converting lead into gold, as the medieval alchemists tried to do, certainly enameling and sintering metal, and perhaps all art makings suggest the possibility that something more than simple chemistry is happening when we make our work. “Alchemy” works!
Acilius Pied Alongé Installed in “Alchemy6

And here’s a happy Linda struttin’ her stuff!!!!
(‘cause not everything is serious at exhibitions, conferences, or in life

Also, my brooch, “Watching my Heart” was to be shown in a second exhibition that opened at the conference, “Cell Full/Filled” (August 2-September 2, 2022). This open exhibition was for pieces that showed cloisonné as the central process. There would also be an attendee’s pop-up exhibition and a less formal Faculty Exhibition. I was pleased to be both teaching and having my pieces shown in four, count ‘em four, superlative collections of enameled work.
“Watching my Heart”

“Watching My Heart” as installed in Cell Full/Filled

Another Happy Linda and “Watching My Heart” Displayed in Cell Full/Filled

I was pleased on so many levels about having my work in “Alchemy6”. For this affirmation of my work, yes, but especially excited because it also represents an affirmation by inclusion, by The Enamelist Society and the exhibition jurors, of the use of sintered metal (in this case, PMC3) in the field of enameling. And it was such a nice combination of having the piece in these exhibitions, “CellFull/Filled”, the Instant Gallery, and a Faculty exhibition as well, plus teaching my class during the conference.

Averill, Ursula, and Linda Viewing the enamel work in the Instant Gallery

Linda’s Pendant “Divergence” shown in the Instant Gallery Exhibition

The fourth exhibition, the Faculty and Award Winners Exhibition was right inside the entrance to the main studio building (the Turner Building). It was the first of the exhibitions that attendees saw as they checked in for the conference.
Faculty Exhibition

One more note, AMCAW supplied a beautiful flyer for the conference attendees and students, and Cool Tools provided discount cards. The Enamelist Society made these available at the check-in table for everyone and I was able to offer them to my students and to those who joined my Break-Out sessions.
A Walk Through My Own Use of Vitreous Enamels on Sintered Meal
Here’s a little bit of my own history with sintered metal and enameling. From the moment I was introduced to metal clay (PMC in 1996), I had a felt that sintered metal could lend itself to the enameling process easily. It took me a long while to feel competent with metal clay and then another long while to produce work that included enamels to my satisfaction (2000).
Ever since I began enameling on sintered metal, I’ve been trying to define how sinterers use enamel on metal clays, that is, how to describe the processes we use to prepare metal clay/sintered metal for enameling? We tend to make integral or printed or pressed cells for enamels when we form our metal clay objects (some of us even combine enamels directly into the metal clay before we fire it).
We sometimes, but not often, make traditional cloisons (cells using fine metal flat wires); we don’t solder, etch or chisel cells for champlevé. Some of us are laser cutting our metal clay, too. I’m going out on a limb to say that the end results of using metal clays with enamels resemble and can be described as those traditional processes.
For example, for my work, I carve printing plates that produce the cells (yup, cloisons, in French) that are used to print (roll) into metal clay, so my work kind of/sort of resembles a territory somewhere between the two aforementioned processes.
The Conference
Onward to the conference and my class, “Grooving on Metal Clay and Enameling”, and my two Break-Out sessions, “Metal Clay Speaks Champlevé”.
I was present at the conference, not only because I was teaching, but because I have been a member of The Enamelist Society since I began to focus on enameling on sintered metal (and wanted to know more about enamels) and that was a while ago, around 2002. Though I was presenting at two Break-Out sessions, one on each day of the conference, I had prepared and set up my demo’s early and I was able to attend some of the Presenter’s talks, most importantly Oleksii Koval, a superb enamelist from Ukraine (whose remarkable work is monumental, and includes portraiture, layered enamels, and occasional addition of traditional and antique Ukrainian jewelry and other artifacts), and that of an old friend, Keith Lewis (whose presentation included images of his work and a courageous sharing of his life as a gay man surviving the times of the last plague, HIV). Both of these enamelists shared their work and the effect of their cultures and circumstances on their work in ways that touched my heart and, I’m certain, the hearts of the audience very deeply.
Oleksii Koval

Destiny, 144 x 120 cm, enamel, copper (photography: Artist)

Keith Lewis

'Maritims unnum lingit assibus IIII' Brooch (Photography: Artist)

My Break-out Sessions
As I mentioned above, I was also asked to do two break-out sessions during the conference itself (my class was scheduled for three days, post-conference) and I chose to demo champlevé using metal clay processes, titling it “Metal Clay Speaks Champlevé”.
For the demo I used polymer instead of the more expensive fine silver metal clay. (This allowed me to do the two demos without emptying my bank account). Since polymer can normally be manipulated like metal clay and since I wasn’t going to be firing during the break-out sessions, it was the ideal material to use (Ask me how I know that leaving the polymer in my van during the long summer drive down to Gatlinburg was not a great idea. . . it began to cure in the hot back of the vehicle, making it a little difficult to manipulate for the demos). I did pre-make a rather informally finished, sintered fine silver champlevé sample, too. After each demo, I provided a “Keynote” presentation, (Apple’s powerpoint-type program) for attendees to view (see below for more information on this and link to view it). This showed images of the work of metal artists who use vitreous enamels in their work. The break-outs themselves were each about one hour, allowing adequate time for the demonstration and the video.
My Samples for “Metal Clay Speaks Champlevé”

All set up for First Break-Out Session

First Break-Out Session

Second Break-Out Session

I made the following step by step process for champlevé and metal clay available as a hand-out, which allowed the attendees to follow along as I demonstrated the process and/or to take with them for future reference.
Linda Kaye-Moses
CHAMPLECLAY OR HOW TO FOOL THE WORLD
AND USE METAL CLAY TO CREATE CHAMPLEVE
1. Select a frame or perimeter or template about 12%-15% larger than you want your final piece to be (metal clay shrinks 12%-15%).
2. Draw a design that will fit within the perimeter and include the perimeter frame line.
3. Trace the design onto tracing paper.
4. Turn tracing paper over and draw over the lines of your entire design with a very dark/soft pencil.
5. Place drawing face down (pencil-side down), on white matte board.
6. Burnish, with a smooth steel burnisher, over the drawing, transferring it to the matte board. Go over the lines on the matte board with a fine line black marker.
7. Cover both sides of the matte board with clear packing tape.
8. Use a jeweler’s saw, saw out the areas that will be enameled (they will be the open areas in the metal clay). Oil the surface of the matte board and set it aside.
9. Roll out a sheet of metal clay about 1mm thick.
10. Place your matte board pattern/template on the top of the metal clay sheet.
11. Use an oiled scribe or needle tool to cut out the areas that will be enameled and scribe around the perimeter to create your metal clay top piece. This piece will be joined to a backplate to create the champlevé form. Dry the metal clay top.
12. Roll out a second sheet of metal clay on an oiled texture mat (rubber stamps or other textures). This piece will become the backplate and the resulting texture will be visible beneath transparent enamels.
13. Place your matte board pattern on this sheet and use a scribe to trim around the perimeter only. This will be the substrate or backplate for the champlevé enameling. Dry this backplate.
14. Refine both pieces: the open work piece and the backplate, using salon boards, moistened clay shapers, etc.
15. Use metal clay Slip/Paste and water to join the two parts. Press gently on a flat surface for about1 minute.
16. Refine by removing excess Slip/Paste using a clay shaper or moistened brush. Check for gaps and add Slip/Paste to them. Dry. Check again. Refine.
17. Dry and fire according to the metal clay manufacturer’s instructions for the longest duration at the highest temperature.
18. Tumble the piece or hand finish using whatever method you would use for any milled metal.
19. Degrease the piece under hot water and a drop of detergent
20. Apply Enamels in the depressions and fire.
FINALLY MY CLASS!!!!
“Grooving on Metal Clay and Enameling”
After the two-day conference, I began to teach my three-day class. The description of my class will probably sound familiar to all my metal clay students from years ago: In this whirlwind class we focussed on enameling using kiln-fired Fine Silver (PMC3) metal clay as the foundation or substrate metal. Metal clay offered an immediate method to create cells and/or depressions for enamels, dispensing with the use of cloisonné wire or traditional champlevé techniques.
Instead we ‘printed’ metal clay to create the cells/depressions for enamels. The printing plates
we carved are those that are used for doing block printing (I told my students they are the kinds of plates that I use to avoid carving linoleum or wood, which I never enjoyed using). The plates are a soft material that feels like a dense silicone, but I’m really not certain what the material is. I just know that it works for easy carving, and prints metal clay beautifully. We carved these plates with traditional linoleum carving tools.
My Printing Plates (one carved deeply and one, shallow)

Metal clay also permitted the fabrication of a complete piece of jewelry without the additional step of separately setting an enameled form or the need for any soldering. The goal for the students was to make at least one simple enameled pendant. There was no prerequisite skill level, either in metal clay or enameling, required for this workshop.
You may ask me why I don’t use copper clay for enameling (go ahead. . . ask me). The answer is two-fold: I don’t enjoy using copper in any form. . . that’s just me; I don’t like enameling on sintered copper. . . again just me; silver has always been my metal of preference for my pieces, with elements of 14k or 18k gold sometimes added for contrast (OK, that was three-fold). I love silver for it’s reflective quality, both by itself and as an enamel substrate. I should add that I have used sintered copper and bronze as decorative elements on the enclosures I often make for my jewels.
I was doing my demos for class at a separate bench at the front of the room, and, although I had been concerned about the students being able to see what I was doing, but the school had provided a camera that projected my hands and what they were doing onto a monitor behind and above me. I have to admit this was a little unnerving, since, when I looked up from my bench, the students were looking up instead of watching directly at what I was demo-ing. I adjusted to this format, although I did ask my students to remind me to keep my demonstration beneath the camera.


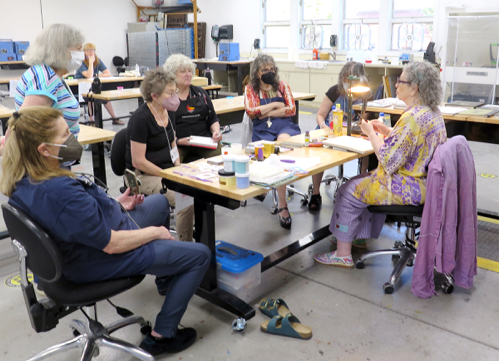
A few of my eight students had worked with metal clay previously, some had used enamels in traditional ways, and some had no experience with metal clay or enameling. I provided line drawings and other stimulating images for them to use, if they needed help coming up with a design (this was very much a whirlwind class with little time to spend figuring out a design). I had suggested in emails to them before the conference that they should begin to think about what their pieces would look like, but most of them used the drawings and templates I brought with me.They all plunged right into the process.

We fired the PMC3 work at 1650 degrees F (900 C) for 2 hours. I found this makes the best (strongest, densest, most burnishable) substrate for enameling. . . actually I use this schedule for all my metal clay work, enameled or not (keep in mind that this is PMC3 and may not be the optimum firing schedule for other metal clays).
Because of the long firing schedule, I thought I might need to offer the students something to do while their pieces were firing. I planned for the students to view and ask questions about the Keynote presentation (the same one I shared during the Break-Out sessions). The studio camera easily connected my Macbook to the monitor.
The presentation was a series of images of enameled work by the following metal clay artists, including Pam East, Julia Rai, Terry Swick Hickey, AJ Newel, Corinna Gheorghe, Janet Harriman, Dixie Murphy, Monique Perry, and Karen Trexler, all of whom generously shared these images with me for this purpose. It also included images of some of my own work as well.
NOTE: The Keynote presentation has been converted to a YouTube video. Here’s how to view the video of the images and artist information from the Keynote Presentation.
1. Open: <lindakayemoses.com>
2. Click on “Resources” in the menu at the top of the site
3. Scroll down to the Link to “Enameling on Metal Clay 2022”; Double Click on this.
4. This will open up to YouTube and the video will begin.
Instead of actually sharing the video while pieces were being fired (the best laid plans are often dislodged by the real world, LOL), the presentation was viewed at random, when examples of enameled, sintered metal were needed).
We ended up firing just before and through the evening meal on the first day of the class. My students and I returned after dinner on the first day of the class, and began the finishing work on their sintered pieces.
I brought metal clay and enameling books from my own library, again planning for the students to wander through them while they were waiting as their pieces were firing This, too, occurred at random times. I also encouraged the students to take the time to rest their eyes and hands, stretch, and take a walk around the Arrowmont campus (with its every so often appearance of a visiting bear), or check out the four exhibitions.


'

‘’A Little Talk About Finishing At the Flexible Shaft Machine and Safety Issues
Working With the Flexible Shaft Machine
As far as finishing was concerned, I demo-ed the use of hand-finishing and flexible shaft finishing (with Radial Bristle Discs), and also the use of a magnetic finisher. My personal process always includes burnishing the surfaces of my pieces using the latter, and that’s why I teach it, since I believe that students are taking my class because they are familiar with my work and want to know how I achieve the look of it. Also, mag finishing burnishes sinter metal appropriately and quickly in preparation for enameling.
You may notice that I wear a face shield when working with a flexible shaft machine. I find it easier to use this protection than to wear safety glasses over my prescription spectacles. Just a note here on Safety. . . Before I begin to teach any class, I require my students to sign a Waiver that acknowledges that what I will be teaching requires awareness of safe ways to approach the processes we will use, and that they are each responsible for their own safety during (and after the class) when using the techniques and processes that I share. This includes, but is not limited to: eye protection when using a flexshaft; dark safety glasses when looking into or removing objects from a firing kiln; active ventilation when firing a kiln and when using patina chemicals; N95 dust mask when handling dry enamels; fireproof gloves when placing and/or removing enameled objects from a firing kiln; fireproof surfaces for kilns; and more.


'

PATINATION
I demonstrated the use of Liver of Sulfur, reminding the students that active ventilation is essential and that, though we heat our solutions of LOS, we never, NEVER, boil the solution, because boiling LOS solution produces fumes that are toxic.
I also showed them that, if there are specks of enamel where there shouldn’t be, the patina will not darken those areas and so will highlight those spots and make it easy to see and grind off the misbehaving spots of enamel.
Hanging out with the LOS


MAGNETIC FINISHERS
I always use a magnetic finisher to burnish my pieces right out of the kiln, whether I’m planning to simply patinate them or enamel. This machine creates a surface that works for both processes.
One of my students mentioned that she had a magnetic finisher, but was unable to produce a bright and burnished finish on her pieces using her machine. Even though this type of machine seems uncomplicated to use, there are a number of variables that can effect the results of using one. We discussed the variables that might be effecting her results. After I returned home, I created a summary of those variables (below) and sent it out to all my students.
MAGNETIC FINISHERS AND THEIR VARIABLES
WHAT IS A MAGNETIC FINISHER?
The parts:
power source,
Magnets in a sealed compartment,
stainless steel pins/pins,
a bowl,
a burnishing liquid.
The concept of a mag finisher is simple: Magnet(s) going around and around, drag the stainless steel shots/pins in a lubricating (the burnishing liquid) solution in a bowl set over them, moving over and around your metal objects. Mag Finishers are simply a magnetic tumbler spinning a lot of magnets. The finishing parts are: the solution, the lubricant, the pins. . . period.
ALL THE OTHER VARIABLES
1. water quality and quantity
2. magnet quality/strength
3. type, quantity and care of pins
4. type of burnishing liquid
5. Duration
6. material of bowl
7. power that rotates the magnets.
1. THE WATER
Water Quality
One variable is your water. Is it municipal or well water?
If well water, there might be minerals in it that cab interfere with your finish. Try using distilled water.
How much water?
Add water about 1/3-1/2 way up the sides of the bowl. Too much water makes the process less efficient.
2. QUALITY OF THE MAGNETS AND MACHINE
THIS IS A MAJOR VARIABLE TO CONSIDER
Not all mag finishers are capable of doing ‘the job’, that is, the quality of these machines can vary.
Stick with machines sold by trusted, reputable suppliers.
3. THE PINS
The small bits of steel that do the job for finishing in tumblers have traditionally been termed ‘shot’.
This is because, those that were originally used in rotary tumblers were similar to the shot used in,
yup, shotguns.
The terminology stuck.
The shot used in mag finishers is different. It’s called “pins”.
The pins, for magnetic finishers, should look like small lengths of thin steel wire/rod.
Mine is about 1/4” in length and about 22 gauge in diameter.
The type of pins generally used for mag finishers is called pins.
These pins have blunt ends, not sharp ends.
These are the type that work with mag finishers.
What Do The Pins Do?
The pins burnish the metals objects in the bowl.
Quantity of Pins?
Less than 1/2 to 1 cup of pins works best, depending on the size of the bowl.
A better way to describe this quantity would be to say:
Add enough pins to the bowl to cover the floor of the bowl about 1/8 inch thick.
Adjust by adding more, if needed.
Using too many pins can interfere with the efficiency of the process. If the bowl has too many pins and/or solution, the power source for rotating the magnets may not be strong enough to handle the weight,
and that will make it work less efficiently, or not at all.
Care and Treatment of Pins
Mag finishers use stainless steel pins. If your pins rusts, it’s not stainless. It must be dried after every use. That’s just not convenient. And, if it rusts, it can discolor your objects.
Stainless steel pins can be left in the bowl under water (I’ve left mine for months of use), even after it becomes darker and darker (and a little slimy). It still produces a burnished finish.
If the pins are really dirty, and that can take months of use, that can interfere with getting a bright finish, and may, in fact, darken the surface of your pieces. Clean the pins with a commercially available pins cleaner (although, in this case, I have used a mild dishwashing detergent), by adding it to water in the bowl and running the machine for about 10 minutes. Rinse completely afterwards.
4. THE BURNISHING LIQUID
Burnishing liquid is a misnomer. The pins burnish.
The burnishing liquid lubricates and makes the water slippery,
and allows the pins to slide around and over the pieces of metal objects being burnished,
without imparting a layer of steel on those objects,
while brightening the surface of the objects.
How Much Burnishing Liquid?
Add only a 2-3 drops of burnishing liquid to the water. (maximum 5 drops) to start. Watch for a layer of ‘soapy foam’ and add no more.
Use a commercially available burnishing liquid designed for machine finishing
(like Rio Grande’s Sunsheen or similar product)
Do Not USE dishwashing liquid. It doesn’t do the job well, if at all.
5. DURATION OR HOW LONG TO RUN THE MACHINE
Run the machine 5-10 minutes. Check the result.
THE BOWL
If your pieces are not getting burnished sufficiently or the surface seems dark,
the material of the bowl might be the culprit.
It might be outgassing into the solution.
I haven’t experienced this, but it’s a possible variable if your objects are simply not being burnished
and you’ve eliminated all other variables.
Substitute a lighter weight plastic bowl. Something well used, like a round freezer or other food storage bowl, about the same size. Doesn’t really need a cover, though that keeps the noise level down.
THE POWER
Whatever activates the rotation of the magnets needs to be powerful enough to do that, even with a fully loaded bowl (water, pins, objects) for the length of time required to burnish the objects.
Some off-brand machines, usually less expensive, may not have the power to do this well, and should be avoided. This is another reason to purchase a mag finisher from a trusted and reputable supplier.
BACK TO THE CLASS
The second day began with a demo of washing and applying vitreous enamels. For this class we used lead-free, transparent Thompson Enamels. I asked the students to confine themselves to using blues and greens to avoid any unwanted reaction of warm colors to silver (Several students brought their own enamels, some of which were lead-bearing and/or warmer colors.) In a longer workshop, we could have explored using warm colors, but we were limited by the length of the class.
MOODLING ON WHAT WE DO
As I mentioned above, the conference schedule included four exhibitions, one of which was the open exhibition ,“Cell Full/Filled: Member Cloisonné Exhibition”. Since it’s not really clear to me how to define the enameling process I use to make my work (see above), I went ahead and submitted my piece “Watching My Heart”.
I had several conversations with conference attendees about my process and how to define what I do. I have always thought that the result of my process could be defined as cloisonné, but the result of these conversations with enamelists was that, since there was no cloisonné wire involved and the cell walls were integral to the fine silver substrate, all of my work would be described as champlevé. I’m not fully convinced, because I believe that the look of my work resembles cloisonné. However, I announced to my students that these definitions don’t matter (oh, horrors). It’s the resulting work that really matters. We could just call my process ‘George’ (or anything else) and leave it at that, LOL. Oy! I have jokingly referred to it as champleclay and cloisonclay!!!! Really, though, all that matters is that whatever process we use, whatever we call it, allows us to apply the glorious and durable colors of vitreous enamels to our sintered metals. Right?
I’m still thinking about how to develop a vocabulary for enameling processes on sintered metal, but it’s really just idle moodling without any practical application.
BACK TO THE CLASS REDUX
On the second day, after demonstrating how to use the flexshaft and the magnetic finisher, I also showed how to wash, wet-inlay enamels and grade/shade the colors. The students had the second and third days, after firing and burnishing the surfaces of the sintered pendants, to enamel and fire their pendants.
CRITIQUES AND SHARING AT THE END
Once my students had completed their pieces on the third day, we gathered for a gentle crit session. I don’t do the crit when I teach. . .so as we gathered around one of the benches where their pendants were displayed, I asked the students to critique their work by answering two specific questions.
First, I asked each of them to select one piece, theirs or another student’s, a piece that best displayed what metal clay can do and how metal clay lends itself to the enameling process, and then, one at a time, to share with the other students why they selected that piece.
Second, I asked them to choose one piece of their own (some students made more than one piece), and share what they learned from making it.


The following images are shown courtesy of the students
Amy’s Work

Sarah’s Work


Susan’s Work

Laurel’s Work

Margaret’s Work

Annette’s Work

Barbara’s Work

Finally, I brought out a few of my own jewels in order to generate and answer questions about how I combine metal clay with enamels in my work.

After that, we finished clearing our benches and cleaned up the room. My students left with their completed pendants, and I packed up my kiln, magnetic finisher, templates, tools, books, and all, and left, what was for me, a very satisfying experience.
But, wait, there’s more!!!''
WHAT I LEARNED OR HOW I LEARN FROM MY STUDENTS
I’ve always said that I learn from my students while they’re learning from me. Sometimes what I have learned is specific to a technique or tool or even a life process I didn’t know about prior to the class. Sometimes, it’s related to a problem that a student might encounter and that requires that together, we solve that problem. The latter was the case with this class.
Ordinarily, I have never had to counter-enamel my sintered/metal clay objects. My understanding has been that the thickness and light density of sintered metal prevents the potential warping of milled metal substrates and cracking of the enamels. When I’ve taught, I don’t instruct students to counter-enamel, with one caveat. . . if a piece requires substantial layers of enamel, coupled with a relatively thin substrate of the sintered metal, counter-enameling may be required in order to prevent the enamels on the front of the piece from cracking.
So. . . in this class, after following my demo, without counter-enameling, one of my students had applied many layers of enamels to the front of her rather large piece, a very elaborate piece, and, without the counter enamel, her enamels developed a very long crack. We were both distressed by this and, thinking about what we needed to do, I suggested that there were several variables at play:
1. the thickness of the enamel on the piece, with no counter enamel;
2. Thermal shock when removing the piece from the kiln;
3. She was concerned that re-firing the enamels would shift some of her warmer colors from a delicate peach to a warmer orange, which she did not want to happen.
She was not prepared to apply counter enamels to the back of the piece right then, since we were under a time constraint, so I suggested that, if, when we were done figuring out what else we were going to do for her piece, it developed a crack again once she returned home, at that point she would fire counter-enamel on her piece, with multiple thing layers that would be thick enough to balance the thickness of the layers on the front.
After considering the two other variables, the thermal shock and the possible color shift, I suggested that she set the kiln to re-fire her enamels at a lower temperature to protect her colors, ca.1320 degrees F for about 2-3 minutes. I directed her to check at 2 minutes to see if the enamels had glossed, by opening the door very slightly (so as not to shock the piece) and repeat until the enamel flowed and completely re-fired to a glassy surface. This temperature would allow the enamels to fire sufficiently, without causing her colors to shift.
To prevent thermal shock when the enamels were fully fired, I suggested that she turn off the kiln, leaving the piece in the kiln, allowing the kiln to cool down on its own, which she did.
The end result of these steps was that, at that time, no furthering cracking of the enamels occurred. Since I have never had this problem with my own work, and never have counter-enameled, this was an intuitive stretch for me, teaching me the process that helped her to achieve success.
Finis


Comments