


You Forgot We Were Seeds; The Making of a Neckpiece
- Aug 21, 2025
- 19 min read
Title: You Tried to Bury Us; You Forgot We Were Seeds
Form: Neckpiece
Materials: Fine and Sterling Silver, 18k Gold, dendritic agate, boulder opal, amethyst, lavender chalcedony,
aquamarine, vitreous enamels
Jewelry Fabrication Techniques: soldering, sawing, patination, metal clay, stone setting, enameling,
handmade chain
Dimensions of Central Pendant: 4” high x 2” wide 1/8” deep (101.6mm high x 50.8mm wide 3.175mm deep )
Year: 2017
Photography: Evan J. Soldinger
Commentary
The neckpiece began with a large oval Dendritic Agate. The image of the dendrites referenced a tree in Winter, and reflected my feelings about the political situation in America, with the values of our country so severely compromised, appearing to have died . So the neckpiece would be about the reinvigoration of life. I had heard a dicho from the Zapatistas in Mexico, “You tried to bury us. You forgot we were seeds” , the origin of which turned out to be a couplet by the Thessaloniki poet Dinos Christianopoulos, “What didn’t you do to bury me,
but you forgot that I was a seed”, and I wanted the piece to be about that, with the intention of using that as
the title of the piece. And so, the concept for the neckpiece began with that phrase and the agate guiding me.
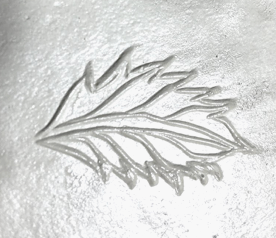
I started the to draw a pendant based around the agate. I wanted to include green leaves, bursting with life around the base of the agate, as if growing from below ground. I would be enameling those leaves. I also wanted to have the piece ‘caress’ the body, just below and near the neck of the wearer, not simply attach a chain. That led me to include several extra leaves. There would also be a repeat of the leaves, set with a gemstone, for the clasp. I imagined the neckpiece elements being enameled and/or granulated or both.
I use Prismacolor pencils to add color to my sketches, as this allows me to see preview of what my pieces will look like with their stones in place. It’s sort of like getting Chanukah presents a little early.
Since I am a colorist and gemstone lover, I also wanted to include a range of stones, consistent with my design. The stones I chose were: a boulder opal, a lavender chalcedony, a citrine, and several small faceted amethysts (the latter from a damaged bracelet that had belonged to my maternal grandmother, whom I had never met), and a carved aquamarine.
All the working images below were shot using my cell phone. The image of the final Neckpiece was photographed by Evan J. Soldinger.
The Agate

My original sketchbook drawings for the neckpiece. You can see my note reminding me to use fine silver granules to enhance the veins of the leaves. I was already thinking about enhancing the leaves before they were even created.

Here’s the drawing of the clasp. I wanted the design of the clasp to be consistent with the design of the other parts of the neckpiece.

The leaves were made of fine silver (from fine silver metal clay, PMC3), supported by a backplate of sterling silver sheet. I decided to add a leaf on the reverse of the backplate, either soldered on or riveted. To be decided later. Many of my pieces, likely even all of them, evolve as they are being made, with decisions based on that evolution. This one would be no different.
To create the leaves I carved a printing plate. I used blockprinting plates which, when carved, create nice ‘cells’ for enamels. (You can check out how to do this in my book “Fine Silver Metal Clay Beads”, since I didn’t want to take up space here with all of that info). It’s a straightforward, hands-on process that has always worked for me, both with and without enamels: transfer the design to the plate; carve the plate; roll the metal clay onto the plate (thickness, ca 2 mm cards); refine the clay, dry, and fire. Given the shrinkage of metal clay,
I enlarged the drawings 116%, which is the increased size that has worked for me. I use a photocopier with toner, because I can transfer the toner image to the printing block. Here are the images from the copier and the printing plates.


The size of the leaves was small, with some narrower areas than some of the work I’ve done in the past. This presented a challenge when trimming the clay, with many of the points on the leaves snapping off as I refined them. Repair, repair, repair.
Once the leaves were completed, I made several other metal clay elements: the stone support for the clasp and the bails for the central pendant. The stone support was a simple
4-5 mm thick disc. I used the printing plate of the small leaves and printed two. Once the disc and two small leaves were dry, I joined them together (see image) using Slip (paste) and dried them. After the clasp was dry, it was refined and smoothed.

The Bails
The bails were two short lengths of extruded square tubes.

Once the bails were dry, I granulated them with .8mm spheres of fine silver (not metal clay). My granulation process is as follows: moisten the area to be granulated; apply a generous amount of Slip (paste) to that area; place the piece to be granulated in a small container; sprinkle the granules onto the piece, gently shaking the container; carefully lift the piece out of the container, allowing excess granules to fall back into the container; place piece on a flat surface and use a smooth, flat tool (I use the back end of a pair of soldering tweezers) to press the granules down gently; dry.

The bails were soldered to the sterling silver backplate after the bails were fired and the milled metal backplate fabricated.
After the leaf units have dried, I selectively granulated them as well.'


I wanted t a slight curving of the units, including the clasp. Because the granules do not shrink, and the body of the metal clay units do shrink during the firing, that shrinkage should cause the metal clay to curve.
Once all the pieces dried, the final refining process was done, including replacing granules that may have fallen off, removing extraneous granules, and smoothing all the edges.
The pieces were placed on a thin layer of Alumina Hydrate on a kiln pad. Since I knew that the pieces will shrink and curve a little, and I want them to be able to slide easily on the surface of the kiln pad, without cracking, the layer of Alumina Hydrate prevents them from being ‘trapped’ by the surface of the kiln pad and allows them to slide.

I just want to back up a little bit here. I think I am what one would call an intuitive maker, that is, I am moved by ideas, spirit, dreams, and heart. When I begin to make a piece, I bring all the design concepts together with those intangibles, and my materials and tools.
The drawings that I do for each piece are frequently just the starting point, and, as a piece is being made, it may evolve, change direction, become something slightly (or dramatically) different. This can be determined by screw-ups (by me), or changes in the way I’m thinking about how a piece will be fabricated and sometimes, what the materials begin to ‘say’ to me. For example, I switched out the citrine for a faceted green quartz, which ‘felt’ right for the design. Don’t even try to ask me what ‘right’ is...it just is.
This long ramble about the latest neckpiece is showing you my path through fabrication of the neckpiece. I did not know at the outset, if the final piece would be identical to, similar to, or wildly different from my original vision for it. There are those artists who are capable of building their work so that the final manifestation of it is identical to their original concept for it. I’m not one of those, never have been, never will or can be.
As it turned out, the granulation forced the clay to curve as it sintered, producing a slight doming effect. I liked this curvature and didn’t adjust it further.
The next step was to sand the back sides/edges of the center and side units so that they will sit neatly on their respective backplates. The intention was to set these units using 18k gold prongs.
It was also necessary to soften the tips of each leaf so that they don’t act as weapons when the piece is being worn, scratching the skin or catching onto garments. Did this to the leaves on the clasp as well. I could have done a little of this before firing the leaf units, but they were too thin and fragile as unsintered greenware. It was best to wait until the material was sintered (solid metal).

While doing the sanding/grinding, I was thinking about how to join these three units. Actually, no matter what I did during this process, a part of my mind was also chewing on what would come next, how I wanted the piece to look and how I would get there.
What needed to be considered: design, design, design; efficiency; keep the side units from flipping up or over; keep any jump rings (whatever) from being oversized (this is a tendency of mine... to overbuild, and I wanted to avoid it); keeping the weight down for comfort’s sake.
The granulated bails and an oval leaf unit were sanded so that they could be soldered to the back of the sterling silver center pendant backplate.
The clasp back was smoothed and then textured using the flex shaft, hammer (reciprocating) handpiece, with a scribe tip. This is a pattern that made the bare surfaces of the neckpiece consistent...it brought all the parts together.
The sterling sheet for the backplates was rolled on a rough sandpaper to give it a texture that has the appearance of the hammer handpiece texture, but a little more subtle. This texture was used on the back of each pendant. Texturing was done before any enameling or soldering, and also I did more once everything was soldered.

Annealing Roll Printed Sheet
Roll-printing caused the sterling sheet to curved. To remove the curve, I annealed the sheet. To anneal the sterling, I marked it with a squiggle (a technical term!!) using a fat permanent marker. When the sheet was heated to approximately annealing temperature, the mark disappears, and I placed a block of charcoal on top of the sheet to flatten it.
Ordinarily, to anneal sterling, I would heat it and then quench it in water. The quenching cools the metal swiftly and completes the annealing process. However, placing the charcoal on top of the heated sheet, allowed me to flatten the sheet sufficiently, without running the risk of cracking the metal.

The next step was to enamel the leaves. Before beginning to enamel, the metal surface within each cell of the leaves was textured once again using the hammer handpiece,. Once the cells were enameled it will gave those areas an extra ‘sparkle’. I can control the impact of the tip more easily with this tool, than simply using a hammer and a punch. Also, doing this manually would require that I place the units on a steel block, with the end result being a flattening of the form, which I want to avoid. Using the flex shaft, I can hold the units in my hand to achieve the overall texture I’m aiming for.

Before enameling the pendant units, I traced their perimeters, to create the pattern for the backplates that would support them.
I made the pattern for the supporting backplates by simply drawing around the perimeters of the leaf units.
To transfer the pattern from my sketchbook to the sterling sheet, I stuck removable clear tape to the drawing and traced the design, using a fine line black marker. I then removed the tape and pressed it on the untextured side of the sterling sheet. Following this pattern, I used a jeweler’s saw to saw it out, removing the tape when I was done.

Here’s what the backplates looked like, leaving additional room for the prongs and a little ‘wiggle room’ for me to mess up, if that happens (‘when’ that happens).

The small ‘buds’ extending from the edges are supports for small units of 18k yellow gold. The larger extensions will support the stones, and are checked against the size of the stones and adjusted accordingly. I made the backplates a little larger than they might eventually need to be, just in case, for example, if the enameled units flatten a little in the kiln.
I wanted the edges of the backplates to be upset (thickened) and textured. I might have to re-do it to adjust the size and shape once the enamels are fired. I use the flex shaft again, with a small gear from an old alarm clock as the tool.

The back of the central backplate will have the oval leaf unit soldered to it, plus the bails, plus a long vine-like unit traveling from the leaf to the back of the boulder opal extension (that’s my intention). This will be both decorative and structural, since the backplate is relatively thin for its size, and may need the extra support to prevent distortion during stonesetting and being worn.
The gemstones were to be bezel set, using fine silver bezels. The perimeter of each stone was determined by wrapping it with a strip of masking tape, trimmed to the exact perimeter (plus a small amount longer to allow for filing the ends).
The height for each bezel ass determined using a steel divider, then the fine silver bezel strip was scribed with that tool, using the masking tape to measure the correct length.

I cut the bezel, first at each end with a pair of flush cutters, and then the length with a pair of scissors. The bezel strips were then annealed, to make it easier to bend around each stone to make certain the length is correct. I then filed the ends of the bezel strips using a mill bastard file and a mitre jig, in order to create a true flush seam for ease of soldering the joint.

The ends of the bezels were then soldered, checked for size and height, on the stones, and adjusted if needed, and the base of each bezel was sanded flat to provide a good surface for soldering.
I wanted to raise the smallest stones on pedestals, but I wanted to wait until after the ‘leaves’ have been enameled.
To raise the three small stones on pedestals, I sawed short lengths of sterling silver round tubing to support the stones. I soldered each bezel to a small backplate that is, in turn, soldered to the tubing, which in turn will be soldered to the main central pendant backplate.
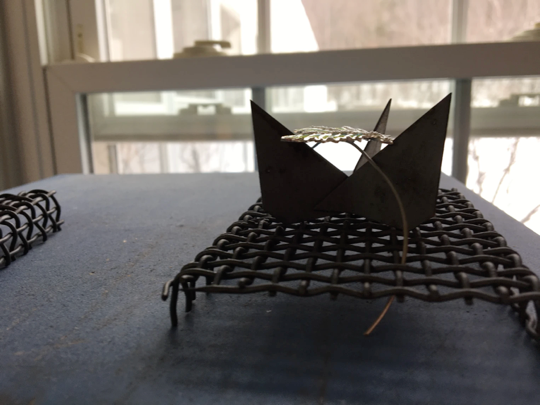
Sawing the Tubing
Even though it appears that I'm sawing a slanted tube, this image was used only to show how I use a tubing jig to cut tubing. I really did cut a level kerf in the tubing (REALLY!).

ENAMELING
I used transparent lead-bearing enamels, in greens, aquas, and blues for shading the greens for the leaves. I wet-packed the enamels.

I mixed a solution of 3 parts distilled water to 1 part KlyrFire (an adhesive) and applied a drop of this into each color of enamel that I selected. Using a fine watercolor brush I applied the enamels to the fine silver units, beginning with the central pendant unit.

I needed to consider that, while enameling the pendants, the curve may shift and change and there may be warping. To maintain the curve, I supported them in the center while enameling them. I used a curved length of nichrome wire to support the enameled units.


I made sure that the sterling silver backplates are the right fit for the enameled units, and adjusted them to fit properly. I checked for the placement of the prongs and drilled holes for them and a hole that will be behind the domed leaf unit.

I also drilled holes in the backplates for the small leaves and through the back of the bezels for the smallest stones, where the tubing pedestal supports will be soldered.This allowed the solder to flow and heat to escape while soldering.
THE CLASP
I made a quality/logo plate. This is soldered to the underside of the clasp at the same time as a wire for the sterling silver S-hook.

The bezel cup for the green quartz was fabricated and then soldered to front of the clasp

I’ve made some links, large and small, using sterling silver balled/beaded wire wrapped with 24g sterling silver round wire. I’m liking the look of these... a little irregular, which suits my design sense… more to my liking than simple wire links. These would be joined to the chain with smaller jump rings.

I fabricated some cones from Sterling round wire that are to be used for the clasp loops.
The walls of these cones were soldered using Hard silver solder.

THE SAWING AND THE SOLDERING
I drilled a hole in the backplate, where the domed leaf unit would be soldered (just behind where the bezel for the agate would be soldered. The hole was needed so that the domed unit will solder completely, without popping off due to the escaping heat. The hole will be hidden under the dome and behind the agate.
Beginning with the central pendant, I soldered the bails, the domed leaf unit, and the vine to the back of the pendant.

18k gold prongs will hold the enameled unit on the front. The tip of short lengths of this wire is beaded using a torch. The wire was inserted in a matching hole in a drawplate and the bead is tapped flat using a planishing hammer. This created a flat head at one end of each of the wires. Each wire will be inserted in a hole from the back of each backplate and soldered in place after everything else has been soldered.
I began by soldering the Domed Leaf, Vine and Bails to the back of the central backplate, using Hard Silver Solder.

I painted the soldered areas on the back of the central pendant with a paste of Yellow Ochre/water to prevent the solder from re-flowing when I began to solder everything on the front.
I placed a large steel cotter pin on a soldering surface and place the central backplate on top of the cotter pin. This is such a large piece that I wanted the heat to circulate beneath it and over it. The cotter pin raised the metal and allows this to happen.
I fluxed the entire front of the pendant. I fluxed and then melted some paillons of Medium solder on the backs of three flattened ovoids of 18k gold, fluxed them again, and placed them, and the small gem settings (on pedestals) and the large agate bezel on the pendant, soldering them all in place.

Next step, I push the 18k gold prongs, from the back of the pendant to the front, through the holes I drilled previously, (extra long, because, if they are too short, you can’t make them longer again). The flat or nail head on the prongs are soldered from the back of the pendant, securing the prongs in place. The gold heads are intended to be decorative on the back of the pendant.
I wanted to solder several small granules of 18k gold to the side edges of the pendant, so I ochred the previous solder joints, front and back, and placed the pendant right side up on a soft soldering block with depressions for the bails to rest in. This permitted the edges of the pendant to rest on the surface, which supported the granules for soldering. This step felt risky, as I was concerned about overheating previously soldered joints and/or melting the large bezel, but all goes well and the gold granules were joined to the pendant satisfactorily.
The moment of truth…checking the fit of the prongs for the enameled unit for the central pendant. Woooohoooo! Happiness!


Once the soldering operations were complete the piece was pickled for two reasons. There is so much flux and ochre that has been heated onto the piece that simply boiling the piece would not remove it (normally my preferred process), and the pendant has been heated so many times, there would be considerable firescale that needs to be removed. Ordinarily, I don’t worry about firescale, because the shadows meld with the patination I always use, but this time, I really wanted to remove the excess firescale.
I needed to then neutralize the pickle, so I boiled the pendant in a saturated solution of baking soda and water. Since there were holes in the back of the small bezels to allow them to have been soldered to their hollow pedestals, pickle would have gotten inside the tubing. This had to be neutralized. Also, pickling sintered fine silver (from metal clay… the domed leaf unit), can result in the material absorbing pickle as well. 20 minutes in the boiling baking soda solution did the trick.
NOTE: Unneutralized pickle leaking out of hollow forms can be a skin-irritant. An additional and serious problem with unneutralized pickle is that when exposed to Liver of Sulfur patina, (which I always use) the pickle and the LOS combine to create a truly nasty gas, which, even in small quantities is extremely dangerous. So, neutralizing is essential.
The smaller side backplates were then completed by soldering the links/jumprings, bezels, flattened gold granules, and prongs.


Lots of clean-up was needed!!!! Oops, found one bezel that was not completely soldered down to the backplate, so back to the soldering bench, pickle and a little baking soda bath again.
After this I added some texture using the hammer handpiece again. This will show around the edges of the enameled units, once they are prong set.

Getting to the Catch and Chain (Whew!)
I made a long length of Roman/Loop-in-Loop chain in Fine Silver and used that for this neckpiece. If you want to know how to make one, buy a copy of “Classical Loop-in-Loop Chains” by Jean Stark <http://www.brynmorgen.com/CLLC.html>. It’s the best book on this subject.
I always have a problem determining necklace lengths (something to do with being calculolexic, I guess). My process is to make all the parts, and then measure the length to see that the pendants sit where I want them on a human being (usually me, at least for measuring).

The clasp consisted of two parts: the hook and the loop. The hook part has already been soldered and completed. The loop units needed to be assembled from their separate parts: two tapered cones; four sterling silver caps for the cones (two large and two small); four sterling silver, square wire bails (two small and two large).
The clasp loop units were soldered/assembled carefully, because the chain has definite directionality. That is, there are four surfaces to each link (it’s really a sort of squared off chain. I determined how those squared loops laid and joined the bails to the tapered cone units, so that the chain did not twist once the bails were joined. This is also not an easy process for me, as the dyslexia, though mild, challenges my spatial relationship skills.

First, end caps were soldered to the wider end of each of the tapered cone units. Then, the small bails were soldered to those caps. Next the smaller end caps were soldered to the narrow end of the tapered units, and the longer bail was soldered to those. If you think of the clasp as similar to a hook-and-eye, this has created the ‘eye’ for the clasp.
Next the loop was soldered to the chain with a jump ring, pickled, and given it’s baking soda bath.
I tumbled the chain and the loop units in the magnetic finisher. To accomplish this without tangling the chain, I coiled the chain and use a short length of copper wire to hold the coil together.

I wanted to tumble the chain and hooks, but to do that I had to loop the chain together, using thin wires, so the chain would not get tangled in the tumbler.

Finally threw the pieces in the magnetic finisher after cleaning up some of my messes. They come out nice and shiny, and any remaining flaws can now be attended to.

I waited to solder the final jump ring that would join the pendants (backplates) to the chain, because I wanted to determine the final length. The next step was to do that. I didn’t need to pickle after the soldering step because it was such a small, specific joint, and any flux will just pop off the jump ring with a little pressure from flat nose pliers. So, no baking soda bath is needed.

I also didn’t need to put the piece in the finisher again, but can simply use Radial Bristle Discs and the flex shaft to finish the jump rings.

PATINATION
I want the entire piece to be patinated, except for the enameled units, as I want them to reflect light differently and more brightly than the rest of the piece. I patinated the entire piece in Liver of Sulfur. For instructions on how to do this, you can take a look at my book, “Pure Silver Metal Clay Beads” or check out Brynmorgen’s “Patina Basics”.

I then completely dried the neckpiece. The hollow units (the tapered cones of the clasp, the bezel settings on tubing, and the leaf unit) all sucked in water and Liver of Sulfur. Because I didn’t want to wait to let it air dry, I placed the neckpiece in a toaster oven, set at 200 degrees F, for twenty minutes.
While the neckpiece is in the toaster oven, the enameled units are tumbled in the magnetic finisher.
After drying, the neckpiece is brightened using the finest (pale green) Radial Bristle Discs in the flex shaft and a very light touch. I don’t want to remove the patina, I just want to brighten the metal.

SETTING THE STONES AND THE ENAMELED UNITS
I was nervous about setting the enameled units, since I am never quite certain that I have the prongs in the right locations to secure the units. I set these units before setting the stones, because, if the prongs are in the wrong place or insufficient to hold the units, then I would need to adjust them or create additional prongs. If I had to create additional prongs, I don’t want to have to remove any stones I might have set, in order to do the soldering that would be required. So, the stones were set only when I know that the enameled units are secure.
After setting the enameled units, my next task was to set the stones. I began by setting the smallest stones first: the two amethysts; the boulder opal; the lavender chalcedony, the carved aquamarine; and the green quartz. The final stone I set is the large dendritic agate.
A little secret: Under translucent stones I place a shim of highly polished Fine Silver sheet, to reflect a little light. I used Fine Silver because I know that it will not tarnish the way that Sterling Silver would. I used the shims because the interior of all the bezels is quite dark due to the patination. I could spend the time polishing the interior of the bezel settings, but I prefer to use the shims instead. I originally made the bezel walls a little high to accommodate the thickness of the fine silver shim.
I set faceted stones upside down. I’ve never been a fan of faceted stones, but I like a little bit of sparkle. Setting them this way, gives me a that sparkle and also a contrast with the smoothness of cabochons.
The Neckpiece
You Tried to Bury Us; You Forgot We Were Seeds

The Tools and Materials Used to Make this neckpiece
Sketchbook
Pencil
Prismacolor pencils
Dendritic agate
Amethyst
Aquamarine
Lavender Chalcedony
Quartz
Boulder Opal
Sterling Silver (sheet, square wire, round wire, beaded wire, round tubing)
Fine Silver (from metal clay)
Fine Silver (granules, bezel sheet, round wire)
18k Gold (wire, sheet)
Oval and round templates
silicone block printing plates
lino carving tool
olive oil release (for metal clay)
PVC Roller
Thickness gauge (playing cards)
Metal clay non-stick surface
Photocopier with toner
PMC3
PMC3 Slip
extruder
small-tipped Shapers
sanding boards
artist knife
needle tool
Computer-controlled kiln
kiln pad
alumina hydrate
220 grit emery paper
Flexible shaft machine
hammer handpiece for flex shaft
Transparent, lead-bearing, vitreous enamels
fine watercolor brush
porcelain enamels tray
KlyrFire
distilled water
eye dropper
Enamel firing tools (trivets, nichrome wire, grids, fork, tweezers)
enameling kiln
heavy grit sandpaper
rolling mill
rubber abrasive wheel
scribe in a pin vise
jeweler’s saw frame and 6/0 saw blades
steel dividers
masking tape
flush cutters
scissors
mill bastard file
mitre jig
Hard, Medium, Easy silver solder
Acetylene/Air torch
Ventilation
carborundum in steel bowl
miniature drill press
#60 drill bit
Steel stamps/ punches (sterling silver, fine silver, 18k gold and hallmark)
Chasing hammer
tapered steel mandrel and winding tool (to make the tapered forms)
drawplate
planishing hammer
paste flux
titanium solder picks
soldering tweezers
fireproof surface
soldering blocks
yellow ochre powder
pickle (Sparex)
pickle pot
copper tongs
baking soda
hotplate
stainless steel pot
water
magnetic finisher and burnishing liquid
Liver of Sulfur chunks
toaster oven
Radial Bristle Discs (3M)
bezel pusher
prong pusher
my heart
my hands


Comments